
Review · EVEREST BASE CAMP TREKS
Everest Base Camp Trek
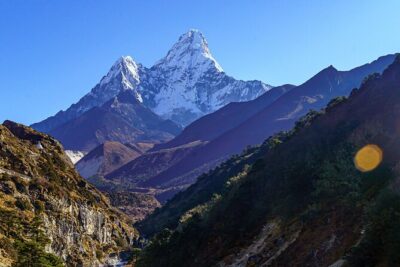
Lukla flights set the tone fast. This Everest Base Camp trek takes you from Kathmandu to Lukla and then through the Khumbu region’s Sherpa villages toward Everest Base Camp. You’ll move through rhododendron forests, hilltop monasteries, and classic high-altitude stops, with big views of multiple 8000-meter peaks.
What I really like is how much is handled for you: full-board meals plus twin-sharing lodge accommodation during the trek. I also like the human side—an experienced, friendly guide, and the flexibility some guides showed in adapting the plan for safety when altitude or conditions required it.
The one drawback to plan around is real-world weather. Flights into and out of Lukla can get delayed or canceled due to conditions at the airstrip, so you’ll want mental patience and a little buffer time at the end.
In This Review
- Key highlights worth paying attention to
- Everest Base Camp trek, in plain terms: what you’re signing up for
- Price and value: $1,380 for 12 days with flights, food, and permits
- Kathmandu to Lukla: why this part deserves extra patience
- The trek proper: day-by-day, with what each stop feels like
- Day 1: Lukla (via flight) to Phakding (2652m)
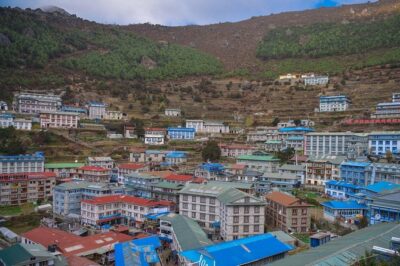
- Day 2: Phakding to Namche Bazaar (3446m)
- Day 3: Acclimatization at Namche Bazaar (3446m)
- Day 4: Namche Bazaar to Tengboche (3820m)
- Day 5: Tengboche to Dingboche (4410m)
- Day 6: Acclimatization at Dingboche (4410m)
- Day 7: Dingboche to Lobuche (4930m)
- Day 8: Lobuche to Gorak Shep (5140m), then Everest Base Camp (5364m)
- Day 9: Kala Pattar (5554m) and back to Pheriche (4243m)
- Day 10: Pheriche to Namche (2840m)
- Day 11: Namche to Lukla (2840m)
- Day 12: Fly back to Kathmandu (1300m) and transfer to hotel
- What support looks like on an EBC trek (and why it matters)
- Lodges, meals, and how to not waste energy
- Permits and fees: the paperwork side you want handled
- Season and weather: best intentions meet mountain reality
- Who this trek is best for
- Should you book the Everest Base Camp trek with Adventure Bound?
- FAQ
- How long is the Everest Base Camp trek?
- Where does the trek start and end?
- Are meals and lodging included during the trek?
- What’s included in the trek cost?
- What if my Lukla flight gets delayed or canceled?
- Do I need travel or rescue insurance?
- Is the trek refundable if I cancel?
Key highlights worth paying attention to
- Lukla logistics are included: round-trip flights Kathmandu–Lukla and Lukla–Kathmandu, with airport taxes covered
- You’re on the standard EBC route: Phakding, Namche Bazaar, Tengboche, Dingboche, Lobuche, Gorak Shep
- Acclimatization is built in: rest days at Namche Bazaar and Dingboche help you climb smarter
- Kala Pattar is part of the payoff: a high viewpoint day at 5554m for Everest views
- Support teams matter: multiple guides (like Raj, Raji, Santosh, Chakra, Raman) show up across successful trips
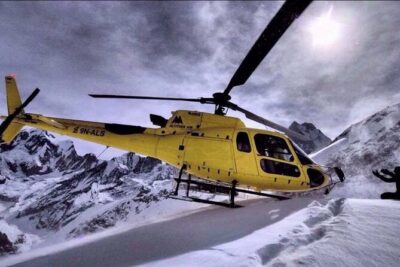
- Weather contingency is taken seriously: notes include possible delays and an optional helicopter escape route
More trails out of Kathmandu, boots ready
- Everest Base Camp Trek – 14 Days★ 5.0 · 1,499 reviews
- Everest Base Camp Trek★ 5.0 · 842 reviews
- Everest Base Camp Trekking★ 5.0 · 485 reviews
- Nagarkot Sunrise View and Day Hiking from Kathmandu★ 5.0 · 471 reviews
Everest Base Camp trek, in plain terms: what you’re signing up for
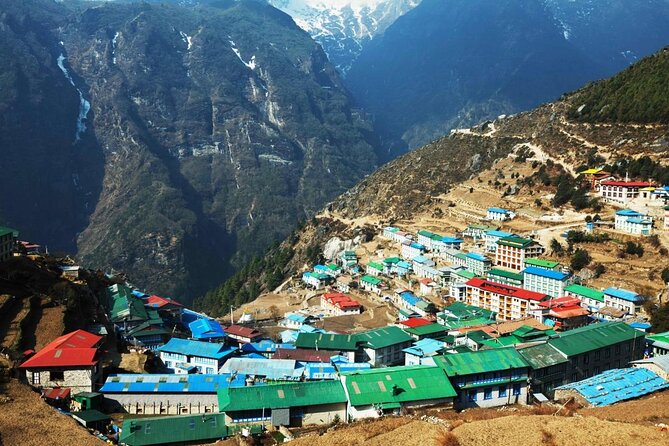
Everest Base Camp is not a stroll. It’s a mix of hiking days, high-altitude sleeping, and slow climbs that make your body work even when the trail seems straightforward on paper. The good news: this itinerary is designed around the way people actually adapt at altitude, with rest and acclimatization stops rather than forcing a straight-line grind upward.
You’ll start around 2652m in the Phakding area and finish with summit-adjacent views near Kala Pattar at 5554m before dropping back down. Along the way you’ll pass through Sherpa villages and classic stops that feel deeply tied to mountaineering culture—not just tourism.
One of the best-value parts is that you’re not left to coordinate the hardest pieces yourself. Flights, park paperwork, meals, and lodge beds are handled, which means you spend your energy on walking and breathing, not spreadsheets.
Price and value: $1,380 for 12 days with flights, food, and permits
At $1,380 per person for roughly 12 days, the biggest question is what you’re not paying for separately. In this package, you get:
- round-trip Kathmandu–Lukla flights (with departure taxes)
- private airport transfers in a vehicle in Kathmandu
- full-board meals (breakfast, lunch, dinner) during the trek
- twin-sharing lodge accommodation during the trek
- an experienced guide
- Sagarmatha National Park permits plus TIMS fee
- a first aid medical kit
- government taxes and office service charges
That’s the value logic: flights to Lukla are often the single most expensive and logistically annoying piece of an Everest trek. Meals and lodge rooms add up too, especially once you’re in the mountains where choices get limited.
What’s not included matters for budgeting:
- travel and rescue insurance
- personal expenses (phone calls, laundry, recharge points, extra water, hot showers, snacks)
- tips for guides/porters (and porter services are optional)
- any extra nights in Kathmandu if flights force schedule changes
If you hate surprise costs, this is one of the reasons this type of packaged trek can feel easier on your wallet and your nerves.
Kathmandu to Lukla: why this part deserves extra patience
Day one starts with flying to Lukla, then trekking to Phakding. This is where the trek’s mood forms: small plane, dramatic mountain air, and then walking right away.
One practical reality is spelled out in the trip notes: Lukla flights can be delayed by hours or even canceled for a day or more because of weather at the airstrip. This can happen even in the best seasons, including October and November. When that happens, you may wait long hours at Kathmandu or at Lukla.
How to make this work for you:
- I’d plan a little cushion at the end of the trip if your calendar allows.
- Keep your expectations flexible at the start and end. The trek itself might be fine; the flights are the wildcard.
There is also an emergency-minded option in the notes: helicopter rescue/escape can sometimes be used when urgent timing is needed, with a tentative cost of about US$ 3000 per lift for up to maximum 5 persons. It also notes that insurance may cover it depending on your policy.
That’s not something you should bank on. But it’s the kind of backup planning that makes a difference when you’re thousands of meters from help.
The trek proper: day-by-day, with what each stop feels like
Below is how the route unfolds and what you should mentally prepare for at each step. Altitude figures are included because they help explain why certain days matter.
Day 1: Lukla (via flight) to Phakding (2652m)
You land at Lukla and trek to Phakding. This is your first gentle adjustment day, usually the moment where everything feels a little harder than “normal hiking,” simply because you’re already starting higher than most of your day-to-day life.
What’s special: you ease into Khumbu village life. It’s not the grand finale yet, but it’s the start of the rhythm: walking, taking breaks, and learning how your breathing responds.
Day 2: Phakding to Namche Bazaar (3446m)
This is a big jump in altitude. Namche Bazaar sits at 3446m, and it’s one of the most important hubs in the region—so much of the trek’s energy centers here.
What to expect: the climb feels steeper as the air thins, even if the trail is well established. Your guide’s pacing matters a lot on this day.
Practical drawback: if you push too hard early, you’ll feel it later. The itinerary then gives you time to adapt, which is exactly what you want after a day like this.
Day 3: Acclimatization at Namche Bazaar (3446m)
You stay at the same altitude to help your body catch up. That rest day is the difference between a trip that feels manageable and a trip that feels like survival.
In this region, acclimatization days also give you a chance to slow down and take in the Sherpa culture around Namche. You’ll be surrounded by trekkers, gear shops, and daily mountain routines.
I like that the plan doesn’t treat acclimatization as optional. It’s built into the schedule.
Day 4: Namche Bazaar to Tengboche (3820m)
You move toward Tengboche at 3820m, a stop known for its hilltop monastery setting. It’s one of those days where the view and the spiritual pause of the monastery area give you a reset.
What makes it worth it: you’re climbing, but you also get a mental break. Your legs are doing work, but your mind gets something back—bigger vistas and a calmer atmosphere.
Possible consideration: nights at higher elevations can feel colder and harder to sleep through. Lodges are included, but you still need to manage comfort with layers.
Day 5: Tengboche to Dingboche (4410m)
Now you’re at 4410m. This is a major altitude milestone, and it’s one reason this trek works when it’s paced well.
What to expect: the air gets thinner, and you’ll likely feel your effort more in your breathing. Take frequent short breaks. Don’t try to match the fastest person’s rhythm if they’re moving quicker than you comfortably can.
Day 6: Acclimatization at Dingboche (4410m)
Another deliberate rest day at 4410m. This second acclimatization stop is a big deal. It’s there to lower your risk of feeling wiped out by altitude as the route continues toward the higher camps.
What I like here is the focus on safety. The notes and experiences associated with this operator also describe the idea of adjusting the trekking plan for altitude sickness prevention when needed.
Day 7: Dingboche to Lobuche (4930m)
You climb again to 4930m. This is where things start to feel more high-altitude than village-life. The trail environment becomes more stark, and your body is now accustomed to working with thinner oxygen.
What makes Lobuche important: it’s a bridge day toward the Everest-side viewpoints. It sets you up for the final push to the highest portion of the route.
Day 8: Lobuche to Gorak Shep (5140m), then Everest Base Camp (5364m)
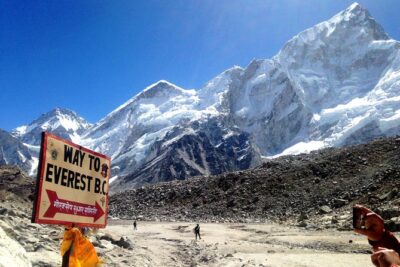
This is a highlight day. You go to Gorak Shep (5140m) and then continue to Everest Base Camp at 5364m.
What you’ll feel: the air is thin enough that everything is slower—walking, talking, even standing still. You’ll want to keep hydration and steady breathing front and center.
Why it’s worth it: reaching Base Camp is the moment the whole trek “clicks.” You’re at the foot of the mountain that has defined exploration and ambition for generations. The view of nearby giant peaks can feel almost unreal once you’re actually there.
Possible drawback: going that high means you should conserve energy. If you sprint the day, you’ll pay for it.
Day 9: Kala Pattar (5554m) and back to Pheriche (4243m)
This is the classic viewpoint day: Kala Pattar at 5554m, then down to Pheriche at 4243m.
Why Kala Pattar matters: it’s often where Everest looks most dramatic from a high vantage point. It’s also a good marker for how far up you’ve climbed—and why you’ll feel it in your legs on the way down.
The down part is important. Descending helps your body recover from a peak elevation day, and Pheriche brings you back to slightly more livable altitude.
Day 10: Pheriche to Namche (2840m)
You drop from the higher world back toward Namche at 2840m. This is a big relief in terms of breathing and sleeping.
What to expect: your legs will feel better, but your knees might protest. Going downhill is still work; good boots and careful steps help.
Day 11: Namche to Lukla (2840m)
Back to Lukla (2840m). You’re finishing the trek with the familiar sensation of being near the end of the route, even if your body still asks for respect.
Practical note: if flight timing is tight, this day’s pacing matters. You don’t want to arrive exhausted if the plan depends on getting to the airport smoothly.
Day 12: Fly back to Kathmandu (1300m) and transfer to hotel
You return to Kathmandu at 1300m. Finally, your sleep and breathing ease back toward normal.
Keep expectations realistic: if your Lukla flight shifts due to weather, you may spend extra time waiting and return to Kathmandu later than planned. That’s why those “contingency days” suggestions in the notes are smart.
What support looks like on an EBC trek (and why it matters)
A good Everest Base Camp trek is more than a route map. It’s the team behind the route.
This package includes an experienced, helpful and friendly guide. The names that show up across successful trips include guides such as Raj, Raji, Santosh, Chakra, and Raman. I can’t promise which guide you’ll get, but it’s a sign that the operator builds around real field knowledge and repeatable service.
What you want from your guide here:
- steady pacing when altitude is tightening
- problem-solving when conditions change
- flexibility when safety requires it
In the notes and trip stories, some trekkers reported plan adjustments for altitude sickness prevention and even added warmth gear like warm down jackets and sleeping bag with special requests. Even if you don’t need those exact items, the mindset matters: the team doesn’t act like the mountain is a checklist.
Lodges, meals, and how to not waste energy
You’ll get full-board meals and twin-sharing lodge accommodation during the trek. That’s a comfort and budgeting win because you’re not hunting for food choices day after day in remote areas.
But there’s a smart way to think about meals at altitude:
- treat meals as fuel, not just comfort
- eat enough even when appetite is odd
- drink steadily (water access is typically part of personal expenses, so plan your hydration habits accordingly)
Lodges will be basic by home standards, but they’re there for recovery. The more you protect your sleep, the more you’ll enjoy the walking days.
Permits and fees: the paperwork side you want handled
This trek includes Sagarmatha National Park permit fees and the TIMS fee. Those are exactly the kind of items that can slow you down if you try to manage everything solo.
The benefit of including them: you can focus on route and recovery instead of learning the administrative side of Nepal trekking.
Season and weather: best intentions meet mountain reality
The notes are honest: even in top months like October and November, you can face delays or cancellations for Lukla flights. So your success depends on both your preparation and the day-to-day mountain weather.
I’d take the advice to heart: mentally prepare for waits at Kathmandu or Lukla, possibly at both ends. Then reduce the damage by saving time for the end of the trip if you can.
You’re also walking at high elevations in a climate that can shift fast. Layering is key, even if the sun is strong at lower spots.
Who this trek is best for
This works well if you:
- want a guided experience with logistics handled
- prefer not dealing with permits, fees, and trek-day meal planning
- have moderate physical fitness
- like the idea of a classic EBC route with acclimatization built in
It may be less ideal if you:
- can’t handle flight uncertainty
- dislike long waits during travel connections
- are very time-constrained with no flexibility
Minimum age listed is 8 years, but eligibility still depends on the realities of altitude hiking.
Should you book the Everest Base Camp trek with Adventure Bound?
I’d consider booking if your priority is a well-run, guided EBC trek where the hard parts—Lukla flights, permits, meals, and lodge stays—are already included. The repeated emphasis on guide support and flexibility is what tips this from a generic trek into something that feels safer and more livable.
I’d think twice if you’re the type who gets stressed by travel disruption. Lukla is weather-driven. Even with the best planning, you could wait hours. If your calendar has slack and you’re ready for altitude work, this is a strong way to do Everest Base Camp.
FAQ
How long is the Everest Base Camp trek?
It’s listed as 12 days (approx.).
Where does the trek start and end?
You start in Kathmandu, fly to Lukla, trek through the Khumbu region to Everest Base Camp, then fly back to Kathmandu.
Are meals and lodging included during the trek?
Yes. The package includes full-board meals (breakfast, lunch, dinner) and twin-sharing lodge accommodation during the trek.
What’s included in the trek cost?
Included items are round-trip flights Kathmandu–Lukla and Lukla–Kathmandu, private airport transfers, meals, twin-sharing lodges, an experienced guide, Sagarmatha National Park permits, TIMS fee, a first aid medical kit, and government taxes/office service charge.
What if my Lukla flight gets delayed or canceled?
The trip notes warn that Lukla flights can be delayed or canceled due to weather. You should prepare for long waits at Kathmandu or Lukla, and the operator says it will try to arrange the earliest next flight when possible. An optional helicopter option is mentioned for emergencies.
Do I need travel or rescue insurance?
Yes. Travel and rescue insurance are not included, so you’ll need to arrange that separately.
Is the trek refundable if I cancel?
No. It’s listed as non-refundable and cannot be changed for any reason.
More Trekking Out of Kathmandu
More Tour Reviews in Kathmandu
Just Reviewed in Kathmandu
- Mountain Bike Tour
★ 5.0 · 3 reviews - Annapurna Panaroma
★ 5.0 · 3 reviews - Mount Everest Scenic Flight 50 Minutes
★ 5.0 · 3 reviews - Kathmandu : Swambhunath & Durbar Square Guided Half Day Tour
★ 3.3 · 3 reviews - Chandragiri Cable Car & Monkey Temple Tour – Private/Group
★ 5.0 · 3 reviews - Kathmandu: Shivapuri National Park Hiking Day Trip
★ 3.3 · 3 reviews
Everest Base Camp Treks, compared.
 ★ 5.0Everest Base Camp Trek – 14 DaysFrom $1,8001,499 reviews
 ★ 5.0Everest Base Camp TrekFrom $1,790842 reviews
 ★ 5.0Everest Base Camp TrekkingFrom $1,350485 reviews
 ★ 5.0Everest Base Camp Trekking – 13 DayFrom $1,399365 reviews
★ 5.0Everest Base Camp TrekFrom $1,445350 reviews
★ 5.0Everest Base Camp Trek -14 DaysFrom $1,420321 reviews
★ 5.0Everest Base Camp Trekking – 13 DayFrom $1,399365 reviews
★ 5.0Everest Base Camp TrekFrom $1,445350 reviews
★ 5.0Everest Base Camp Trek -14 DaysFrom $1,420321 reviews
 ★ 5.012 Days Everest Base Camp TrekFrom $1,099289 reviews
 ★ 5.0Everest Base Camp Trekking – 2025/2026From $1,339199 reviews
Browse the lists this tour appears in