
The trek takes care of the hard parts. This 11-day Annapurna Base Camp trip is designed as a small-group adventure with airport pickup, built-in transport, and a clear route so you can spend your energy on the mountain days.
I especially like the combo of strong guiding and practical comfort. One guide you might get is Indra, noted for being attentive and strong on routes, terrain, and weather—exactly the kind of detail that makes trekking feel less stressful. I also like that meals and overnights are included for the trek portion, and you may be able to use gear like a sleeping bag and down jacket if you need it.
The main consideration is simple: this is still a high-altitude hike. You’ll want moderate physical fitness, and budget for the items not included like your visa, travel insurance, tips, and optional porter help if you need it.
In This Review
- Key Points You’ll Notice on This Trek
- The ABC Route: What This Trip Is Really Good At
- Price and Logistics: What $785.72 Buys You (and What You’ll Still Pay)
- Day 1 to Pokhara: The River Drive That Sets the Tone
- Day 2 to Tikhedunga (1577m): Your First Real Trekking Build-Up
- Day 3 to Ulleri and Beyond: Steep Early Work
- Day 4 to Poon Hill (3232m): Sunrise Views That Justify the Effort
- Day 5 to Ghorepani: Forest Walking (and a Different Kind of Challenge)
- Day 6 toward the Chhomrong Area: Suspension Bridge Moment
- Day 7 into the Sanctuary Zone: When the Valley Opens Up
- Day 8 to Annapurna Base Camp: The Big Payoff Day
- Day 9 and Bamboo: Forest Changes and a Steeper Recharge
- Day 10 Back to Nayapul and the End-Run Down
- Day 11 Kathmandu: Tourist Bus Morning and a City Reset
- What You Get for Comfort (Beyond the Famous Views)
- The Trek Fitness Reality Check
- Who This Tour Suits Best
- Should You Book This Annapurna Base Camp Trek?
- FAQ
- What’s included in the trek package?
- Do they pick you up at the airport and drop you off?
- Is a porter included?
- Do I need a Nepal visa, and is it included?
- What permits are covered?
- How does cancellation work for a full refund?
Key Points You’ll Notice on This Trek
- Small group cap (max 10 travelers): easier pacing and more personal attention on the trail.
- Poon Hill sunrise time at 3,232m: a big viewpoint with clear-sky peak watching.
- Permits handled for you: Annapurna Conservation Permit and TIMS are included.
- Base Camp day with a return to Dovan: classic ABC satisfaction without you micromanaging logistics.
- Natural hot spring stop included: a useful reset day for tired legs.
- 10 nights of lodging plus most meals included: less daily spending and more time recovering.
More trails out of Kathmandu, boots ready
- Everest Base Camp Trek – 14 Days★ 5.0 · 1,499 reviews
- Everest Base Camp Trek★ 5.0 · 842 reviews
- Everest Base Camp Trekking★ 5.0 · 485 reviews
- Nagarkot Sunrise View and Day Hiking from Kathmandu★ 5.0 · 471 reviews
The ABC Route: What This Trip Is Really Good At
Annapurna Base Camp is the kind of trek that sounds effortless in photos and feels serious in real life. What makes this experience appealing is that it’s set up to remove the logistics headaches. You’re not piecing together transport, permits, guides, meals, or the “what happens if weather changes?” questions. That’s the difference between hoping for the best and planning for the trail you’ll actually meet.
This route also mixes big view days with calmer valley walking. Over 11 days, you’ll start near Nepal’s city base in Kathmandu, move to Pokhara, then gradually step up into the Annapurna region. You’ll pass through Gurung village areas, and the itinerary includes time for sightseeing in Kathmandu and Pokhara, so the trip doesn’t feel like a nonstop treadmill of trekking.
Price and Logistics: What $785.72 Buys You (and What You’ll Still Pay)
At $785.72 per person for an 11-day experience, you’re paying for a lot that’s usually annoying to coordinate yourself. The big value items here are the guide, permits, lodging for 10 nights, meals (breakfast included for 10 days, lunch for 9 days, dinner for 8), and transport (including Kathmandu–Pokhara–Kathmandu by tourist bus). There’s also airport pickup and drop-off.
What’s not included is just as important:
- Your Nepal entry visa fee (you can issue it on arrival, but you’ll need 2 passport photos).
- Travel insurance (compulsory).
- Tips for guide and driver.
- Optional porter help (listed at $20 per day if you want one).
- Your own snacks, drinks, and anything alcoholic/non-alcoholic not included.
My advice: treat the trek price as the “core package” and keep a separate budget for the extras above. If you’re a first-timer with a heavy pack, that optional porter cost can be worth it for comfort and safety. If you’re traveling light, you may not need it.
Day 1 to Pokhara: The River Drive That Sets the Tone
You start at Tribhuvan Airport in Kathmandu with a pickup and a 7:15 AM start time. Day 1 is a long but scenic drive toward Pokhara, traveling along the Trisuli and Marsyangdi river corridors. The itinerary notes you’ll see Ganesh Himal and the Manaslu peak from the way down, and you’ll be moving through river towns where the scenery shifts fast.
Why this matters: you’re not thrown into steep hiking immediately. That drive gives you time to settle, get your timing straight, and adjust to the slower rhythm. The downside is that “7 hours in a vehicle” can feel like a lot if you arrived from a long-haul flight. If you’re prone to feeling stiff after travel, do gentle stretching and hydrate early.
Also, the route is noted as a rafting-friendly river area. Even if rafting isn’t part of this specific program, the hint is useful: this is a place where water and terrain are part of daily life, not background scenery.
Day 2 to Tikhedunga (1577m): Your First Real Trekking Build-Up
Day 2 starts with breakfast, a drive to Nayapul (about 1.5 hours), then your first hike segment out toward Tikhedunga (1577m), via Birethanti (1065m). The key idea here is gradual altitude engagement: you’re not jumping straight to the highest parts yet, but you’re starting to work your legs.
What I like about this setup is the pacing. Your first trek day should help you learn how your pack feels and how your breathing changes on uphill sections. If you go too hard early, you’ll pay for it later—especially when you’re headed for viewpoint climbs.
The practical drawback: this first hiking stretch still has effort. Even “only” 4 hours of walking can feel harder if your body is jet-lagged.
Day 3 to Ulleri and Beyond: Steep Early Work
Day 3 is described as a steep climb for the first two hours, followed by gentler walking as you pass through Ulleri (2070m) and Banthanti. That steep start is common in Annapurna region trekking. The benefit of that pattern is you get a clear signal early: you’re climbing, and you’ll need steady pace, not sprinting.
Here’s the tip that actually helps: keep your effort controlled on the steep portion. Don’t chase a fast “pace goal.” Your goal is to arrive feeling like you could do it again. If you start Day 3 feeling good, you’ll be in a stronger position for the higher-altitude viewpoint day coming next.
Day 4 to Poon Hill (3232m): Sunrise Views That Justify the Effort
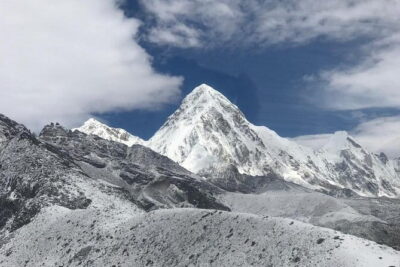
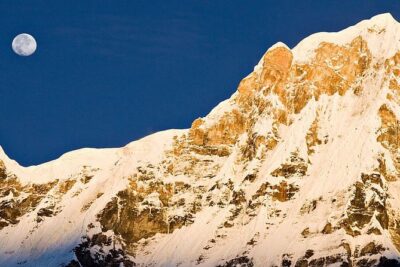
Day 4 is your Poon Hill push to 3,232m. The itinerary specifically calls out sunrise-style viewing over major peaks: Dhaulagiri (8167m), Tukuche Peak (6920m), Nilgiri (6940m), Varaha Shikhar (7847m), and Annapurna I (8091m) plus Annapurna South (721m…). It also makes it clear this is a day where the “where you are” matters as much as “how far you walk.”
This is one of the most praised moments of any ABC-style trip—and for good reason. When you’re up at a viewpoint like Poon Hill, the trail’s hard work suddenly feels worth it. You’re also building altitude experience in a controlled way. Sunrise climbs often mean colder temperatures and earlier wake-up times, though the exact timing isn’t spelled out here.
Possible consideration: if you’re sensitive to early mornings or cold, pack for warmth. Layering beats relying on one heavy layer.
Day 5 to Ghorepani: Forest Walking (and a Different Kind of Challenge)
Day 5 shifts you into a descending rhythm toward Ghorepani. The route passes through rhododendron, oak, and dense forest areas. The description notes hearing chirping birds and moving through that sheltered terrain, which is a welcome change after viewpoint height.
This day can feel mentally easier, but it still challenges your legs. Descents stress knees and calves. If you’re the type who charges downhill, slow down. You’ll keep more energy for the upcoming crossing and climbs.
Day 6 toward the Chhomrong Area: Suspension Bridge Moment
Day 6 begins with a hot breakfast at the lodge and then describes a descent via stone stairway for about the first 1.5 hours. Then you cross the Chhomrong Khola on a suspension bridge, and afterward you climb out of the side (the description cuts off, but the pattern is clear: descent, crossing, then uphill effort).
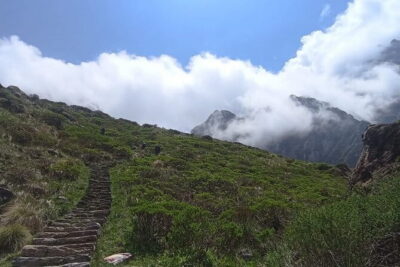
This is a classic type of day in the Annapurna region. You get variety—stairs, bridge crossing, and then the grind back uphill. The benefit is that it breaks up monotony and keeps you alert.
My advice: use the bridge crossing and the climb after it to reset your pacing. Drink water on the approach. Taking in fluids at the start of a long uphill stretch makes a noticeable difference.
Day 7 into the Sanctuary Zone: When the Valley Opens Up
Day 7 is centered on the Chhomrong area. After breakfast, the valley widens and the trail becomes less steep, and you’ll start seeing gates to the sanctuary. The route also mentions crossing areas affected by avalanches.
What this means for you: this is where the trek starts to feel more “real wilderness” and less like a sequence of village stops. The footing can be more variable too, especially in avalanche-affected sections where debris patterns may show up in trail design.
A practical consideration: if you’re prone to motion sickness or fatigue, keep your breaks short and frequent. Widened valleys can trick your brain into thinking it’s easier than it is.
Day 8 to Annapurna Base Camp: The Big Payoff Day
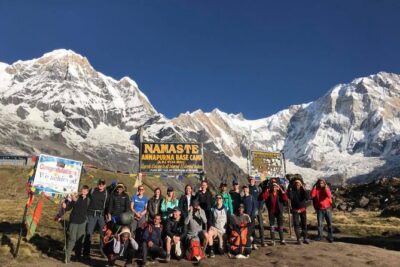
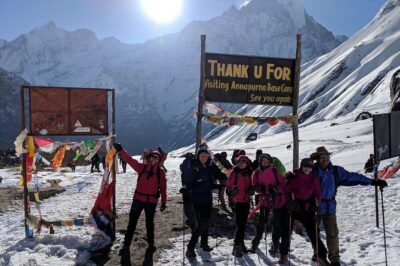
Day 8 is the centerpiece. After breakfast, you’ll visit Annapurna Base Camp and take in the surrounding Himalayan views. Then you trek back toward Dovan.
This is the day you came for. The itinerary highlights that the views from base camp are amazing. The emotional payoff here can be big, so it helps to plan your energy so you’re not spent before you get there. Don’t burn yourself out on the climb. Arrive ready to look around, not just stand there wishing you could sit.
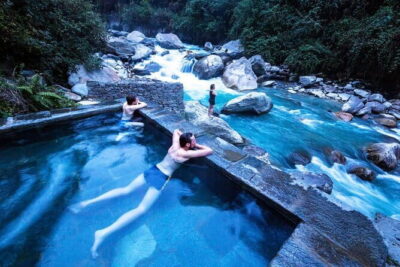
One more note: the itinerary overview also mentions a natural hot spring dip during the overall trek experience. If timing allows, treat it like a recovery tool, not a “bonus.” If your muscles feel cooked, that soak can turn the next day from miserable to manageable.
Day 9 and Bamboo: Forest Changes and a Steeper Recharge
Day 9 starts with a descent to Bamboo through forests with rhododendron, oaks, and bamboo plants. After Bamboo, the trail goes steeply up for about an hour.
This day matters because it’s a reminder that the trek isn’t just “go up, then enjoy.” You’ll still face effort after the base camp high. Bamboo-area trekking through mixed forests can be pleasant, but the steep section is where you’ll feel fatigue.
My tip: if you have any lingering calf or knee tightness, this is where to protect it. Short, steady steps work better than long strides.
Day 10 Back to Nayapul and the End-Run Down
Day 10 transitions out of the higher route. After breakfast at the hotel, you start with a descent, then you get flat land until Birethati for lunch. From there it’s about 30 minutes to Nayapul, where you connect to the road portion again.
This is the “legs learn they’re finished” day. It can feel weird because you’re close to the end, but you’re still walking. If your body has been pushing for days, treat this as recovery walking: keep it smooth, take breaks early, and don’t assume the end is easy just because it’s the end.
Day 11 Kathmandu: Tourist Bus Morning and a City Reset
On Day 11, after breakfast, you take a tourist bus to Kathmandu at 7 AM. The drive is described as passing satellite towns, rural settlements, and gushing rivers.
Then you’re done with the trek component. The idea of having time for Kathmandu is valuable because you’ll want a day to do something other than trekking math—laundry, a simple meal you don’t have to carry, and time to process what your body just did.
What You Get for Comfort (Beyond the Famous Views)
A good trek isn’t only about the top of the mountain. It’s about how you function every day. Here’s what’s built into this experience:
- Guide support included: plus the guide’s salary, food, drinks, and accommodation. That means you’re not stuck figuring things out alone.
- Equipment support: sleeping bag, down jacket, and a trekking map are provided if necessary, then returned after the trek.
- Meals and lodging included: breakfast for 10 days, lunch for 9 days, dinner for 8 days, plus accommodation for 10 nights.
- Permits included: Annapurna Conservation Permit and TIMS.
This matters for safety and sanity. Your body does best when food is predictable and sleeping is consistent enough to recover. When those pieces are handled, you can focus on walking well.
The Trek Fitness Reality Check
The tour states travelers should have moderate physical fitness. That’s a fair description for Annapurna Base Camp. You can do it with training, but you can’t do it with willpower alone.
I’d recommend you arrive with a habit of:
- walking regularly (ideally with hills),
- practicing stairs or inclines,
- and building tolerance for long days on your feet.
If you’re currently living mostly indoors, give yourself weeks to adjust rather than hoping the guide route fixes everything.
Who This Tour Suits Best
This works especially well if you:
- want a small group and don’t want the headache of organizing route, permits, and meals,
- appreciate a guide who stays sharp on weather and terrain (Indra is one example of that kind of attention),
- want a trek that includes real sightseeing time in Pokhara and Kathmandu,
- like the idea of having essentials handled, but still enjoy walking day by day.
It may not be the best fit if you strongly prefer total self-direction, or if you dislike early mornings for viewpoints.
Should You Book This Annapurna Base Camp Trek?
If you want Annapurna Base Camp with lower stress and solid structure, this is a strong pick. The price covers the main “hard to coordinate” parts—permits, meals, lodging, guide, and transport—and the small group size keeps it from feeling crowded or chaotic.
Before you book, make sure your budget covers what isn’t included: Nepal visa, mandatory travel insurance, tips, and optional porter help. Also be honest about your fitness and your willingness to handle cold mornings and long walks.
If you can handle moderate challenge, you’ll likely end up with the kind of memory that sticks: sunrise peak views, a base camp moment you can’t fake, and enough support that you’re not exhausted by logistics.
FAQ
What’s included in the trek package?
The package includes a guide, transport Kathmandu–Pokhara–Kathmandu by tourist bus, accommodation for 10 nights, and meals (breakfast for 10 days, lunch for 9 days, dinner for 8 days). It also includes Annapurna Conservation Permits and TIMS, plus all fees and taxes. Equipment like a sleeping bag, down jacket, and trekking map may be provided if necessary.
Do they pick you up at the airport and drop you off?
Yes. Airport pickup and drop-off are included, and the start meeting point is Tribhuvan Airport in Kathmandu with a stated start time of 7:15 AM.
Is a porter included?
A trekking porter is not included. If you want one, the listed cost is 20 USD per day.
Do I need a Nepal visa, and is it included?
The Nepal entry visa fee is not included. The data says you can issue the visa upon arrival at Tribhuvan International Airport in Kathmandu, and you’ll need 2 passport size photos.
What permits are covered?
The trek includes Annapurna Conservation Permits and TIMS.
How does cancellation work for a full refund?
You can cancel up to 3 days in advance for a full refund. If you cancel less than 3 days before the experience start time, the amount paid will not be refunded.
More Trekking Out of Kathmandu
More Tour Reviews in Kathmandu
Just Reviewed in Kathmandu
- Mountain Bike Tour
★ 5.0 · 3 reviews - Annapurna Panaroma
★ 5.0 · 3 reviews - Mount Everest Scenic Flight 50 Minutes
★ 5.0 · 3 reviews - Kathmandu : Swambhunath & Durbar Square Guided Half Day Tour
★ 3.3 · 3 reviews - Chandragiri Cable Car & Monkey Temple Tour – Private/Group
★ 5.0 · 3 reviews - Kathmandu: Shivapuri National Park Hiking Day Trip
★ 3.3 · 3 reviews
Annapurna Base Camp Treks, compared.
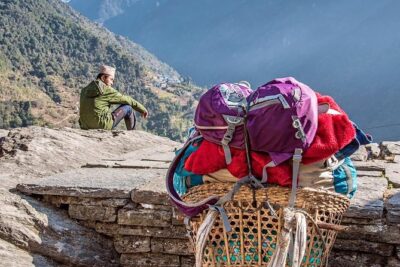 ★ 5.0Annapurna base camp trek 5 DaysFrom $699252 reviews
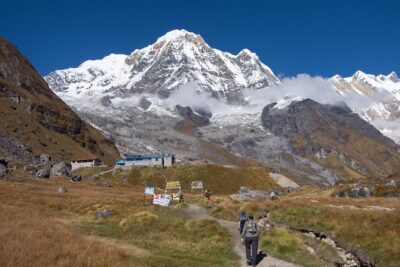 ★ 5.014-Day Private Annapurna Base Camp TrekFrom $1,090180 reviews
 ★ 5.0Annapurna Base Camp TrekkingFrom $1,779116 reviews
 ★ 5.0Annapurna Base Camp TrekFrom $935111 reviews
★ 5.0Annapurna Base Camp TrekFrom $1,350107 reviews
★ 5.0Annapurna Base Camp TrekFrom $935111 reviews
★ 5.0Annapurna Base Camp TrekFrom $1,350107 reviews
 ★ 5.0Kathmandu to Annapurna Base Camp (ABC) 5-Day TrekFrom $99102 reviews
 ★ 5.0Annapurna Base Camp Trek- 11 DaysFrom $99990 reviews
 ★ 5.0Annapurna Base Camp Trek 12 DaysFrom $80085 reviews
Browse the lists this tour appears in